Tag Archives: fae

Of Ravens, Inktober and Froggicorns

Decorative raven image with wild roses, moths and magical tomes
The Raven

In the months leading up to the Raven King’s Faery Ball and the Faery Fayre in Glastonbury I found it a lot easier to create artwork inspired by ravens than by faeries. I sketched stuffed ravens at Manchester Museum and live ravens at Gauntlet Bird of Prey centre, as well as taking some useful photos. I drew bird skulls and listened to Grimms’ raven-themed fairy tales on audiobook, ‘The Raven’ and ‘The Seven Ravens’. I discovered, among other things, that ravens mate for life, have a complex vocabulary, like to play and can fly upside-down for long distances!

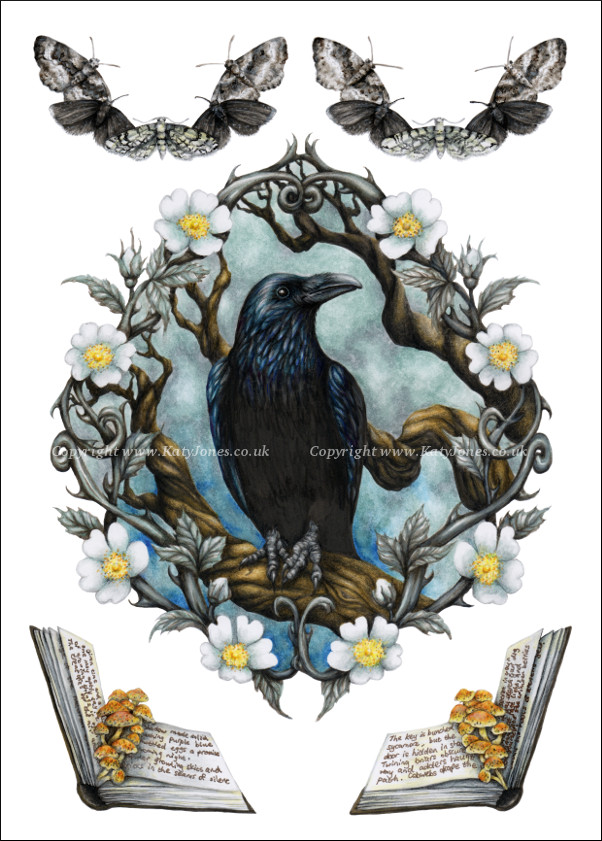
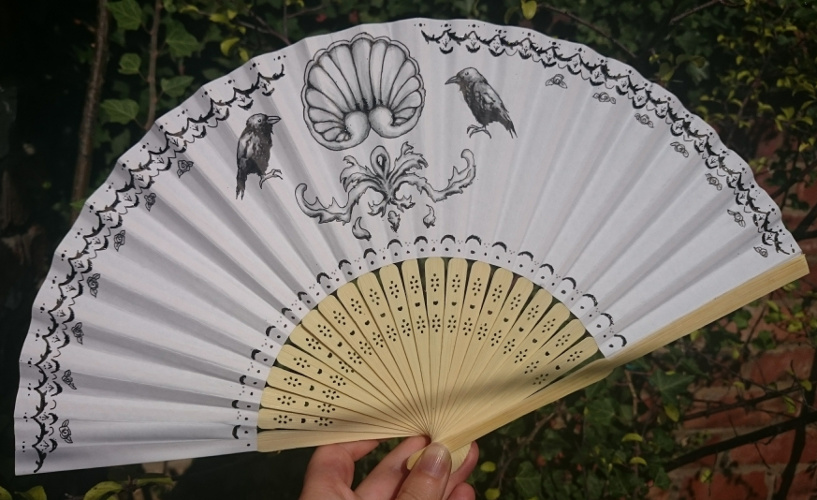
At the same time I was looking at Regency style costume and decorative detail, with the plan of incorporating it into fairy-ish images, but these ideas didn’t really come together. (I think it may have the difficulty of representing the fae while allowing them to remain mysterious which was inhibiting my creative process…see my last post.) However, my Regency researches did inform my Raven picture, above (read more about it here). I also bought some paper fans, which seemed like a brilliant idea for an event involving a ball, but they proved quite difficult to decorate. Most media bled through the paper quite easily and looked messy on the reverse side. It certainly wasn’t possible to use layers of blended markers with pencil crayons on top, as I do for most of my artwork – the paper would’ve disintegrated! My most successful fan featured – you guessed it – ravens.

Regency style hand-decorated fan with ravens
Hand-decorated paper fan with ink and black glitter. And ravens.

The latter part of my plan for creating artwork for the Faery Fayre involved Inktober. For the uninitiated, this is an annual challenge started by Jake Parker, which involves producing an ink drawing every day throughout October. Participating artists post their work online with the hashtag #inktober. My plan was to try to do some raven or/and fairy themed artwork as part of the challenge. I thought that black and white might lend itself to the world of ‘Jonathan Strange and Mr Norrell’.

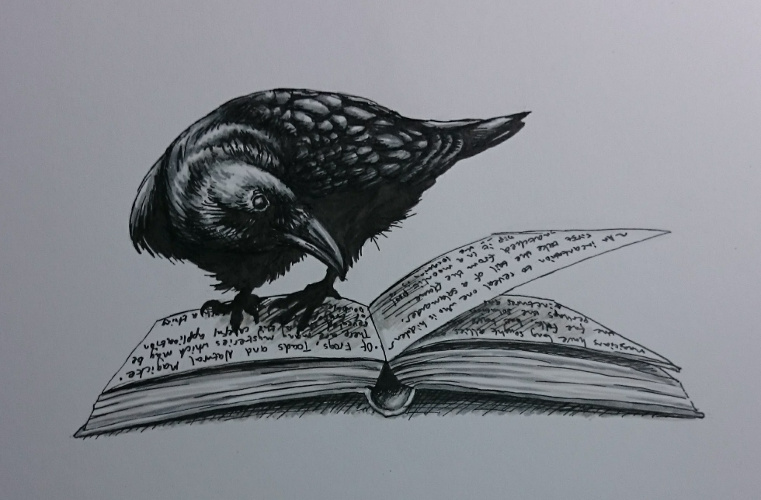
So, predictably, I drew a raven.

Raven Portrait for #inktober
Raven Portrait

…and another raven.

Clever Raven drawing for #inktober
Clever Raven

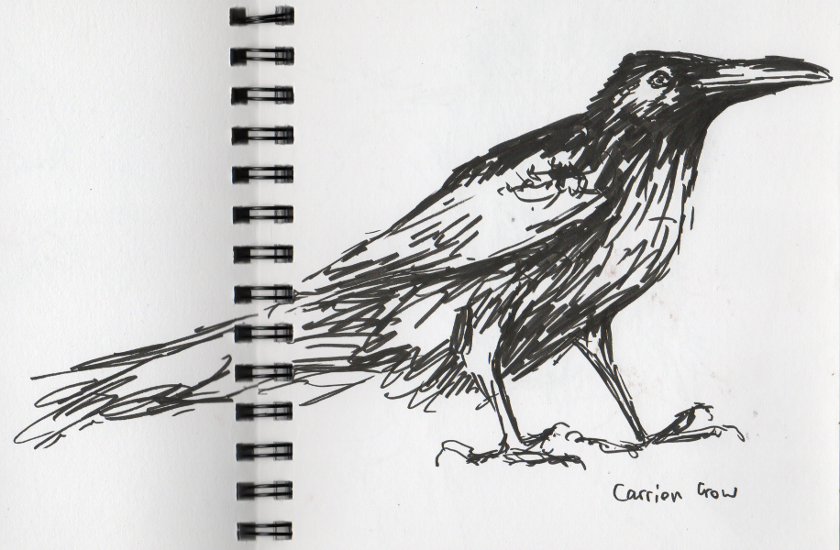
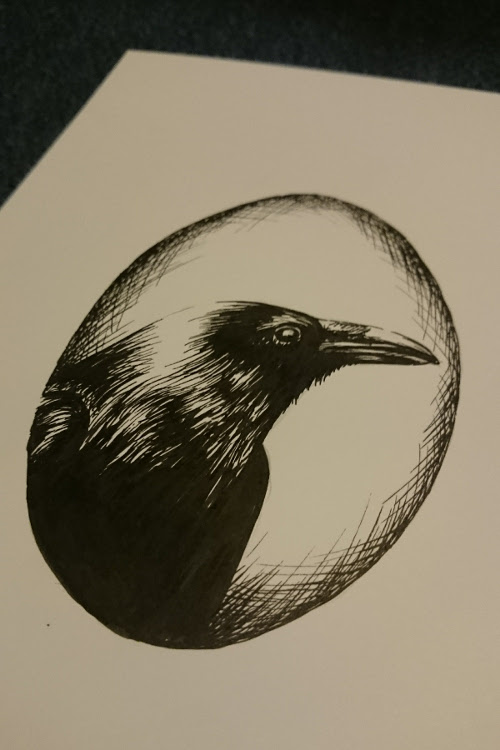
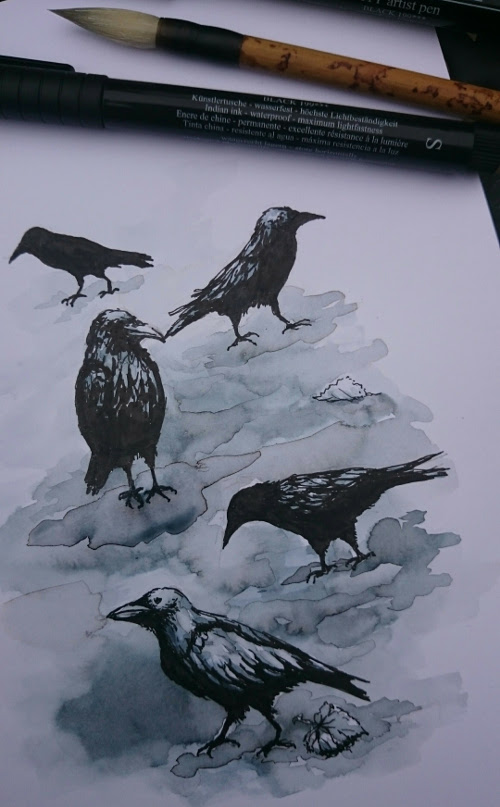
These ones are not ravens, they are crows. Which is quite different.

Crow drawing for #inktober
Not Ravens

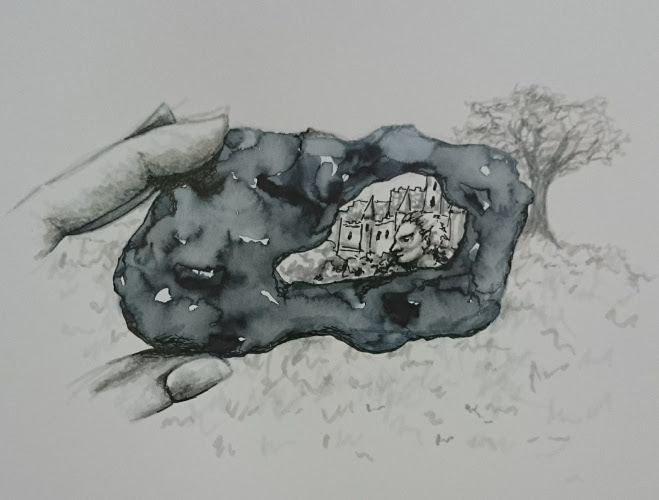
Also, remarkably, I did some other Inktober drawings which were not ravens – or even like ravens. You can see the whole series on Instagram. I managed to do an Inktober drawing every day but one…on the day we travelled down to Glastonbury we had a dreadful journey and I was in a dark car till after midnight, so it proved impossible to do a drawing during the right twenty-four hour period. (Nor was I particularly inclined to when we finally arrived, especially as I had to be up for the Faery Fayre the next morning!) The whole Inktober experience was surprisingly exhausting. (Probably I shouldn’t have been surprised that it was difficult to fit an extra thirty-one drawings into a month!) I’d definitely recommend it though…it was encouraging to find that I could produce a daily ink drawing, regardless of whether it was convenient or whether I thought I had any ideas. It also proved to me that I can work more quickly than I imagine…and that I can get good results (sometimes, at least!) with little or nothing in the way of reference.

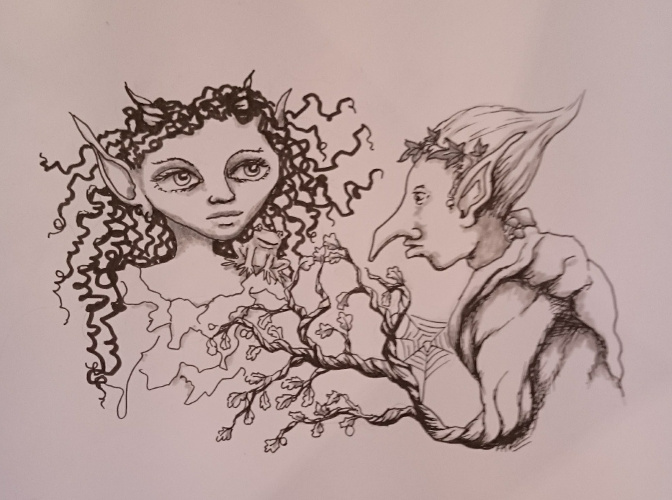
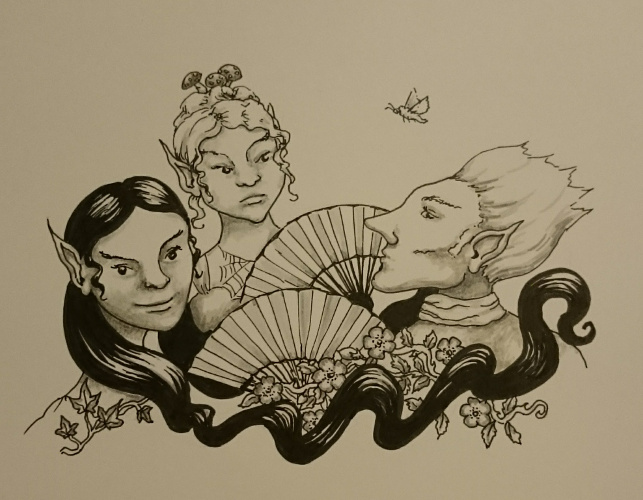
I even managed some faeries.

Faerie Ball drawing for #inktober
Faerie Ball

I’m currently having an Art Sale of all my available Inktober work on Facebook – at very affordable prices. The last day is November 16th and to date I’ve sold exactly half of my available work (a few of my Inktober drawings were in sketchbooks I didn’t want to dismember, so I didn’t offer them for sale). I’m really pleased to have sold so many! It’s very satisfying to send my drawings off to good homes!

Hagstone drawing for #inktober
Hagstone – a stone with a natural hole, through which faeries can be seen!

I can’t end this post without saying that today (8th November…technically it’s now 9th, but only just!) was the official release date of the picture book I illustrated for writer Kay Green, ‘The Loveliest of all was the Froggicorn’! The best source of information about the book is probably the Facebook page, but there is now a Froggicorn Twitter account too.  I have some books available myself, which I am happy to personalixe. You can contact me using the link above to arrange a purchase.

Edit: You can now purchase a signed and personalized copy of ‘The Loveliest of all was the Froggicorn’ from my online shop.

Fae Folk drawing for #inktober
Fae Folk I drew while running my stall at the Faery Fayre. I was inspired by the amazing costumes I saw, though no one looked quite like this!!


In the Court of the Raven King

Carrion Crow Sketch
Not actually a raven.

I fell in love with Susanna Clarke’s ‘Jonathan Strange and Mr Norrell’ about a decade ago, I suppose. A copy was handed to me reverently by a friend who told me, ‘I think this is the next ‘Harry Potter’!’. The book was indeed received with the wildest rapture by an enthusiastic portion of the reading public. Looking at online reviews now, though, I see that it’s not for everyone. I imagine that if you don’t read pre-twentieth-century literature you might find it hard going. Otherwise, it’s basically Jane Austen with fairies, so…what’s not to like?

The rest of the world discovered Jonathan Strange et al last year, when the BBC TV adaptation came out. It was satisfyingly atmospheric and Childermass, Arabella and Jonathan Strange himself were wonderfully portrayed. Some of the magic looked brilliant on screen (Strange’s sand horses come to mind) but I was a little less convinced by the fairies. Perhaps this is because the evocative language used to describe the fairies and their realm in the book simply cannot be translated into something as definite as a filmed image, without losing most of its mystery. How, for instance, can the costume department create “a gown the colour of storms, shadows, and rain and a necklace of broken promises and regrets”? The fairies in Clarke’s novel are just beyond the reach of our imaginations; but fairies on screen are seen, revealed, defined, pinned down; and so, I think, inherently less magical.

The fairies were one of the aspects of the novel I thought was exceptionally interesting (besides the humour, the totally convincing magical Regency world, the characters and the intricate footnotes…). Susanna Clarke’s fairies are so ‘other,’ so much more fairylike than other fictional fairies. In comparison there is something rather disappointing about Tolkien’s elves – which are basically nobler, better-looking humans – or Cicely Mary Barker’s Flower Fairies, which are diminutive, dressed-up kindergarteners. Clarke’s fairies are wilder, much less comprehensible, far less rule-bound and, above all, far less human. They are the fairies of traditional English folk tales.

All of this is on my mind, because I have recently bought tickets for the Raven King’s Faery Ball, this October, in Glastonbury. I’ll be selling my artwork at the associated Faery Fayre that same weekend, so I’m planning to develop some artwork loosely inspired by Susanna Clarke’s novel and the folklore which informs it. (I’m feeling slightly daunted, because drawings and paintings of fairies share the drawbacks of TV adaptation – it is difficult to maintain mystery whilst visually portraying it!) I’m intending to research the Regency fashions which appear as part of the backdrop to the book – and which are adopted by some of the fairies; I think a sketching trip to Manchester Gallery of Costume might be in order. I also need to draw ravens and revisit some of my books of English fairy lore. I need to get busy…

Woodland Faerie Garland Tutorial

As tutorials go, this one is going to be a little sketchy! Unfortunately I didn’t take photos of the making process, not knowing I was going to attempt a tutorial.  The crafting is all simple enough…please ask questions if anything isn’t clear.  There was quite a large element of crochet to the garland I made, but if you can’t crochet then never fear – I’ve included crochet-free options to make a garland that will be every bit as effective.  So, without more ado…

Woodland Faerie Garland Tutorial

What you will need:

  • wire – enough to go around the head of the woodland-faerie-to-be, plus about 10cm extra
  • ribbons – I suggest at least 4 or 5 1m lengths of satin ribbon in colours of your choice, about 1 cm wide.  It’s fine if some are thinner – and I think organza ribbon could work well too.
  • green yarn and an appropriate crochet hook, if you plan to crochet leaves and tendrils.  Crochet-free option: 3m green yarn or 1m green cord and also some scraps of green felt.
  • yarn in the colours of your choice for crochet flowers, or else felt in the colours of your choice
  • glittered wire butterfly – around 5cm across is good (I found mine on eBay)
  • optional extras: artificial flowers and leaves, beads, buttons (novelty buttons can work well…toadstools, minibeasts etc!)

Instructions:

  1. First of all you need to make a ring of wire, which will be the basis of your garland.  I used green pipe-cleaners for this, which was a mistake! I liked the idea that any visible bits of wire would be green and fuzzy and kind of organic looking.  However, the pipe-cleaners were really not sturdy enough for the job, even though I wrapped them three or four thick all around.  For a less flimsy garland you should check out the wire in your local craft shop…or your local hardware store. Green wire would be my first choice, though you could always spray paint other colours of wire, or wrap it in green tape…florist’s tape, for instance.  To be honest, though, greenness is far from vital.  The next stage covers the wire almost completely, even if you’re not trying! Anyway, make a ring of wire to fit the head of your faerie-to-be.   This can be done with just a head measurement, but ideally the wearer should be there so you can get the fit right and make sure the garland’s going to sit where you want it.  Just wrap the wire round your faerie’s head, overlapping the ends of the wire.  Then twist each overlapping end around the circlet, trying not to leave any sharp ends on the inside, where they might puncture your poor faerie’s scalp.  This twisty bit will go at the back of the garland.  (If you’re wrapping your wire in green tape then now’s the time to do it.)

    wire twisted together
    The twisty bit at the back should look like this (only with sturdier wire!)
  2. Start wrapping your wire circlet with ribbon.  To do this, take a 1m length of ribbon and find the centre point.  Place the centre point at the front of the circlet and wrap one end round and round the wire until you reach the back of the circlet, where the wires are twisted together.  (You don’t need to worry about covering the wire completely at this point.)  Then wrap the other end of the ribbon around the other half of the circlet until you reach the back of the circlet.  Knot the two ends of the ribbon together where they meet, leaving two long tails dangling…these will hang down your faerie’s back.  Then take another length of ribbon and repeat the process.  You might want to wrap it the other way so it criss-crosses over the first ribbon – it’s up to you!  Once you have two ribbons wrapped and knotted you will probably find the wire underneath is more or less covered.  If you want more coverage – or more colours of ribbon – add another.  Then take any remaining ribbons and knot them into place about half way along their length at the back of the circlet.  You should now have a wrapped circlet with a bunch of ribbon tails at the back (which will not all be the same length…I think it looks best if the lengths are a bit random!)  I like to trim the very ends on the diagonal to minimize fraying…and just because it looks better.  The knots might look a bit of a mess, but don’t worry – they get covered up later on.
  3. Next you’re going to make a long, leafy green tendril.  To crochet it, start chaining with your green yarn.  When your chain reaches something like 12cm, you can start to form the leaf.  Starting in the second chain from the hook and making one stitch per chain, crochet dc, htr, tr, tr, htr, dc (that was UK terms.  In US terms: sc, hdc, dc, dc, hdc, sc).  That’s your first leaf! Continue chaining for another 12cm or so and add another leaf…and so on until your tendril is about 1m long.  (You can vary your leaf length and width as the whim takes you, by doing more stitches, or using taller ones.) For the non-crochet version you can either use a 1m length of green cord for your tendril, or you can plait together three 1m lengths of green yarn.  For the leaves, cut out some leaf shapes from green felt.  If you feel like it you can embroider veins onto the leaves before you sew them onto the tendril at intervals.  When your tendril is complete, twine it around the circlet and knot it at the back.
  4. Side view of the Woodland Faerie GarlandNow you will need to make some flowers! If you don’t already have a favourite crochet flower pattern then Google will be your friend…there are loads of free flower tutorials available.  For the non-crochet version, simply cut out some felt flower shapes.  You could add a bead or a button for the middle of the flower.
  5. This is probably the time to attach your glittered wire butterfly.  It needs to be attached at the back of the circlet, neatly covering all the ribbony and yarny knots.  (Some of these butterflies are on wire or a clip and others need to be sewn.)  Of course, you don’t have to have a butterfly at the back.  You could easily use a biggish flower, or perhaps a bow – or anything else which will cover the knots and provide a focus.Back of garland with butterfly
  6.  Final step.  It’s time to get down to some serious embellishment! Gather the flowers you’ve made, along with whatever else you have in the way of buttons, beads, artificial flowers and other fripperies. All you need to do is decide how you want to arrange them on the circlet and then sew them in place (though it can take a while to get it looking suitably encrusted if you’re anything like me!).  I found it easiest to sew most of mine to the tendril, but you also have the option of sewing onto the ribbon (or both).  I sewed a few of my smaller bits and pieces onto the dangling ribbons at the back.

    side of garland with crochet flowers, buttons and beads
    Fripperies!

And that’s it! It’s quite straightforward but could be varied in so many ways…I’m quite tempted to try an autumnal version in shades of gold, copper and flame – and it would be interesting to see how it would look if you ditched flowers in favour of leaves in a variety of shapes and colours.  Hopefully I’ve inspired someone to have a go at making their own version…if you have a go at making a Woodland Faerie Garland I’d love to see pictures!

Woodland Faerie Garland